
Until something happens to us, we tend to act as if it never will, and we look the other way. Take a moment right now to look at your computer's desktop and imagine every file on it is gone. That should be a nightmare!
Thanks to cloud computing, online storage and email services with huge quotas, we may no longer need to back up our critical data and email ourselves. Still, the proposal we were just working on, our project file or our thesis usually sits right there on the desktop. We've become more aware of saving several versions of a file with "Save As" while we work, but we're really just writing those files to the same disk. And it isn't only project files that matter: we keep every kind of content (photos, videos, journals, e-books, manuals, invoices and so on) in digital form, so every second without a backup increases our risk.
You get to work in the morning and turn on your computer:

Sorry to hear it. No need to panic, though — you did make a backup, right? Excuse me?
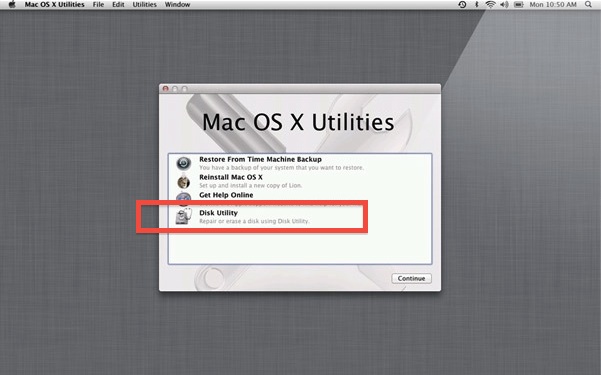
Last week my nephew sent me a message: "I turn on my MacBook Pro and get a Mac OS X Utilities screen. It was working perfectly fine last night."
I told him to choose the bottom option to run Disk Utility and apply "Repair".
This is the result screen he sent me:
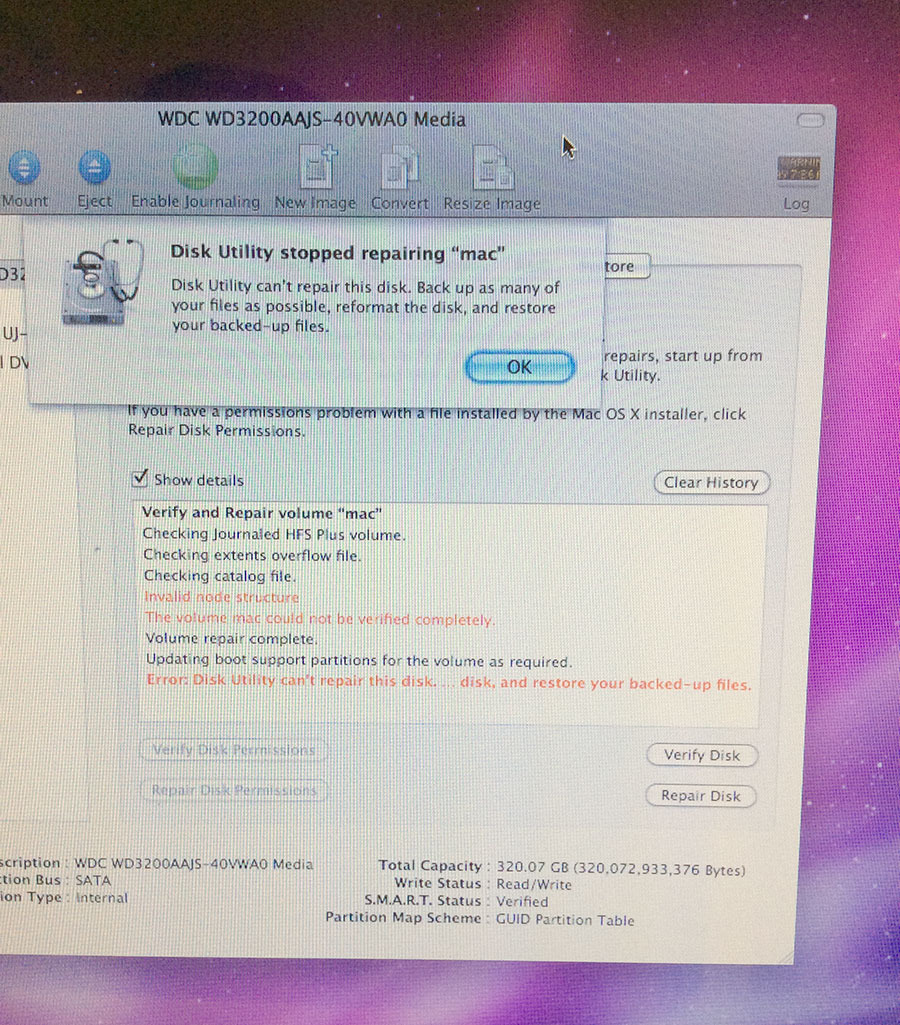
He packed everything up and brought it over: "My photos are on it, and my latest Illustrator files are on the desktop. The rest doesn't matter."
I asked about his Time Machine backup. There wasn't one.
Disk Utility tells us to "back up whatever files you can", but how are we supposed to do that when OS X won't even start? On top of that, I didn't have an external SATA enclosure to hold the 2.5″ drive even if I opened up the back of the MacBook. Then "Target Disk Mode" came to mind.
You probably know this one: if you hold down the "T" key while your computer starts up (you can look up the Target Disk Mode shortcut for your Apple model on Google), another Mac can access your computer's internal drive as if it were an external disk. You need a FireWire or Thunderbolt connection for it. You can find more details here.
I connected my nephew's MacBook Pro to my trusty old iMac over FireWire, and a screen like this appeared on the MacBook Pro:

But nothing showed up on the iMac. I could see the MacBook Pro's drive in Disk Utility, but I couldn't mount it. So we started looking for data recovery software. Searching Google for "os x disk recovery", I found Disk Drill by CleverFiles. Like other similar tools, its basic version lets you see the files you can't access, but asks you to upgrade to the paid version when you want to recover them.
Luckily, after the first scan we could see the files on the MacBook Pro, so we bought the pro version to recover them. Recovering the 70 GB "Users" folder to the iMac over FireWire took nearly 30 hours! If you're going to recover a disk, be ready for a long wait (the screenshot below is just an illustration).

After successfully copying the critical files to the iMac, I restarted the MacBook Pro and, by pure luck, the OS X login window appeared. After entering the password, OS X opened. I immediately wanted to take a Time Machine backup of the whole disk, but half an hour after starting, it threw an error and said it couldn't continue. Since the disk was clearly failing, I didn't want to reformat it and do a clean install on the same drive. SSD prices had been dropping nicely, so we bought a 240 GB SSD for 390 TL including VAT, installed it, and the computer was reborn. Then we ran Target Disk Mode in the opposite direction, this time from the iMac, and copied the recovered files back.
The moral of the story: If you take the trouble to run a Time Machine backup one night, you won't have to panic in a situation like this. We were lucky in the example above; recovering data with tools like Disk Drill isn't always possible. You can buy a 2.5″ 500 GB or 1 TB external drive for around 160–200 TL and use it as a Time Machine disk. If you haven't backed up in a long time, now is the moment.
0 Comments
Leave a comment